A camera slider is an effective way to give your videos that extra professional look whether it be for YouTube, film, TV or home movie. Adding a little bit of controlled motion into a scene can capture a viewers attention and bring a scene to life!
What are the benefits of using a camera slider for video production?
Most people don’t even notice this on a conscious level, but almost all film and video productions that we see through commercial venues have a lot of motion in them. In many TV shows and feature films, average scene length is only about 3 minutes.
Within each scene however, is another thing going on, average shot length. The average length of time any one particular shot is on screen is often just barely 3 to 5 seconds. Yes, seconds!
One of those alternatives is learning how to use an inexpensive camera slider.
A camera slider is how we average Joes can gain some of the same interest grabbing results and benefits of the viewer’s attention span. If we’re interviewing an interesting person for our video, let’s add some subliminal attention grabbing motion to our video.
What type of movements can a camera slider do?
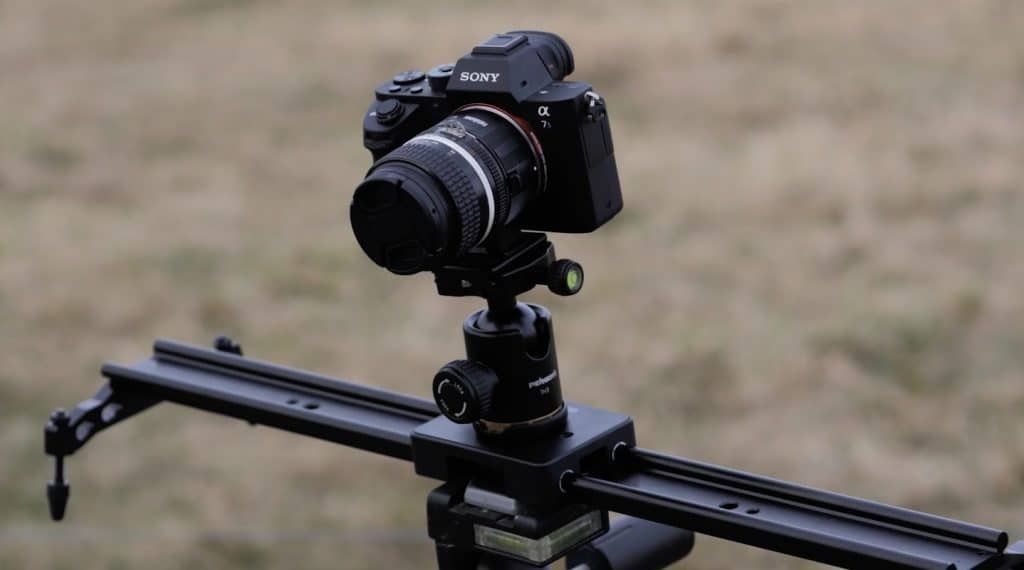
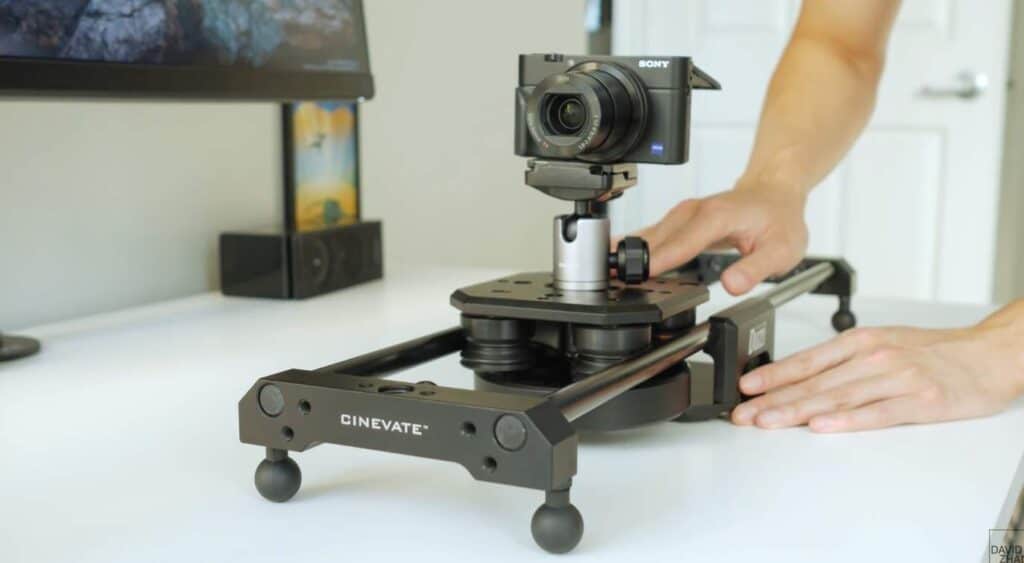
Even on most of the inexpensive sliders I looked at, the slider can be mounted in various ways on a tripod. Using the bottom plate, a simple mounting is right on top of the tripod. The movement can be side to side or front to back. Add a fluid head to the top of the slider, and we can even pan and slide at the same time.
Start out on one side of a person’s face, for instance, then slide over to the other side of their face, all the while panning a very slight amount to keep their face centered. With a little practice, this is easier to accomplish than trying to describe it. Doesn’t have to be a person, any subject matter works.
Here is also a great video that goes into more depth about the types of movements.
If the slider can be mounted vertically, then up and down motion can be introduced. Vary the angle of the tripod head the slider is attached to and we can get a diagonal angle of motion. Once our creative juices get flowing, the camera slider will enhance our video productions all the way around.
Top 5 Best Camera Sliders For Video & YouTube Reviewed
1. Kamerar 31” Carbon Fiber Fluid Motion Video Slider

One of the first things I noticed about this slider was its light weight. The high grade carbon fiber rails are why it’s so light for what it does. I’ve become a huge fan of carbon fiber components in the past few years. Stable and smooth sliding with virtually no flex of the rails ensures a jerk free final product. Using six rollers and a belt drive is no doubt another part of why this is so smooth in use.
I keep talking about being on top of a tripod, which I think is the best way to use this, but it also has short legs of its own. The four individually adjustable legs are sturdy enough on a table top or the ground and they easily fold up out of the way when using a tripod.
Another nice additional benefit was the built in bubble level on the camera plate. Always nice to have an indicator of what parts are level or not. Especially when considering some of the movements we might try with this.
Overall this Kamerar Camera Slider was easily the most user friendly device to operate and it gave me the best results for my desired video look. This really is a versatile slider that works well with pretty much any camera whether that be a smartphone, DSLR or mirrorless camera. Highly recommended!
2. Neewer 30″Carbon Fiber Camera Track Dolly Slider
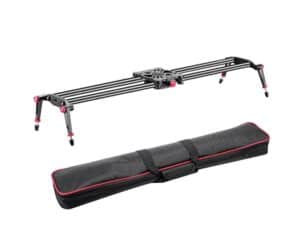
It’s actually easy to get used to making the movements by hand pressure, but certain dual motions, like panning while sliding, may take a few practice runs before we get it down pat. You got that, Pat?
One of the nice things about this Neewer model which got it placed on my list of best camera sliders, is the multiple mounting points for attaching to a tripod. Using the different threaded holes, we can readily set up for vertical, horizontal, and 45 degrees shooting.
This unit also has legs of its own, but I still prefer using a good, sturdy tripod if available. A good video tripod is an essential tool to have for any video shoots, so go ahead and check out my other article to find a video tripod tailored to your own needs.
3. IMORDEN 40″ Pro DSLR Camera Slider
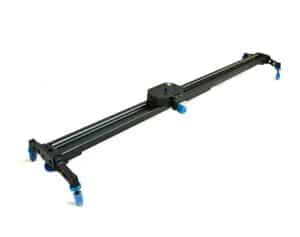
Like the above Neewer unit, this model also has mounting holes for vertical shots, and I even thought about using those side holes to mount the slider to two tripods or some other type of stand.
If I do that, I’m thinking I might be able to mount a real heavy rig to the slider. Like maybe an ultra telephoto zoom lens. I’ll try that out when I get a chance. This model would work well for that, I’m thinking.
The ball bearings sounded different than the rubber rollers on some of the other models, but it was every bit as smooth. The tension knob took some getting used to, but I really didn’t see much of a need for it.
Without a flywheel and belt, I found that I needed a little practice on all of these to get my motions and hand pressure just right to get the best results. Overall this was a great unit which gave me some fantastic results while shooting videos for weddings and YouTube videos.
4. Neewer 40″ Aluminum Alloy Camera Track Slider
Moving onto the next slider is this Neewer unit which is a little lighter duty than the one I tested above. It is instead made of aluminum and steel rather of carbon fiber. So, even though it’s slightly lighter duty, it is a bit heavier.
The cost is very low, so that makes this model a good way to get your feet wet in the world of camera slider use for your videos. Seriously, I have batteries that cost more than this slider!
It has multiple mounting points for tripod attachment, allowing for a variety of types of movement. Up and down, side to side, push/pulls and heaps more. The twin rails also made all these shots buttery smooth and steady.
It has very basic leveling legs for use on a table top, but they don’t raise up very high. So table top use would be fine, but not much use on any uneven ground. They were completely removeable, though, and I would put this on a tripod for most shoots, so I didn’t consider it any real drawback.
5. Zecti Camera Slider
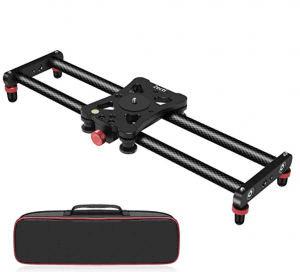
It looks like a single rail, but it has two steel rails inside the u-channel column. The smallish camera plate has a built in bubble level and slides back forth smoothly. The slider moves on ball bearings, so it shouldn’t change how smooth is moves over time like any sliders using basic friction to move.
I would consider this model to be light duty, as it is very compact and portable. With a lighter camera rig on it, this worked fine however.
It has mounting holes on both ends and underneath, so vertical slides are available to you. The bubble level was located real close to the camera screw, because the plate is so small, which means I couldn’t see it with several of my cameras. That was the only real downside of this slider. But with it being so cheap, it’s hard for me to complain.
Other than those minor nitpicks, I could recommend this with no real reservations to anyone wanting to try their hand at camera sliders.
My conclusions
Can an inexpensive camera slider really qualify for a list of best camera sliders for video and YouTube? Enthusiastically, I say YES!
It will take some practice to get used to using a slider for vlogs or other shorter videos. There is a learning curve to these. But, once you get it down, you will see an improvement in the final edit of your videos. I even did a few shoots without any post production editing, simply adding in some smooth movements from time to time and the end result looked great.
By making our videos look more like a professional production, we can capture and keep viewer attention and that should lead to increases in our engagements. More will come back to our vlogs, and they are likely to be more invested in our product or project. Hopefully my list of best camera sliders for video has helped guide you on your next video.
Slide on over, and get one of these.



Leave a Reply