Do you know what one of the most important factors are for viewers watching your video…
Surprisingly it’s not actually the video. But rather the thumbnail that entices the viewer to click on it. Whats even more surprising is that many YouTubers still don’t take advantage of this proven strategy to increase views.
So where do you start?
In this tutorial I will be using an online free editing tool called Canva. I used to use Photoshop on a daily basis, but now I find myself on Canva because of its user friendly interface and their huge range of free photos, graphics, illustrations and their awesome templates!
If you want to create a stunning menu, birthday card, booker cover, business card, logo, poster, resume or a YouTube thumbnail, Canva is the place to go! I’ll stop babling on and get straight into this tutorial as that’s why you came. Lets get stuck in!
How To Make a Youtube Thumbnail In 4 Easy Steps!
Step 1: Create a Free Canva Account
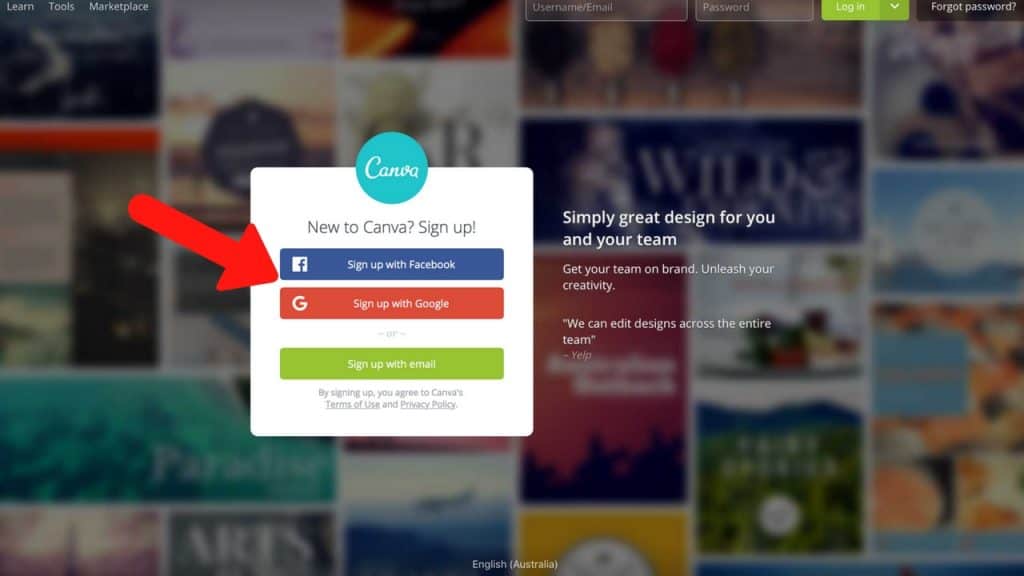
First things first is to head over to Canva. Unfortunately you need to create an account to use Canva, however this process only takes a few seconds. You can either sign up with Facebook or use your desired email. Before you know it, you’ll be welcomed into the Canva homepage where you can create to your hearts desire.
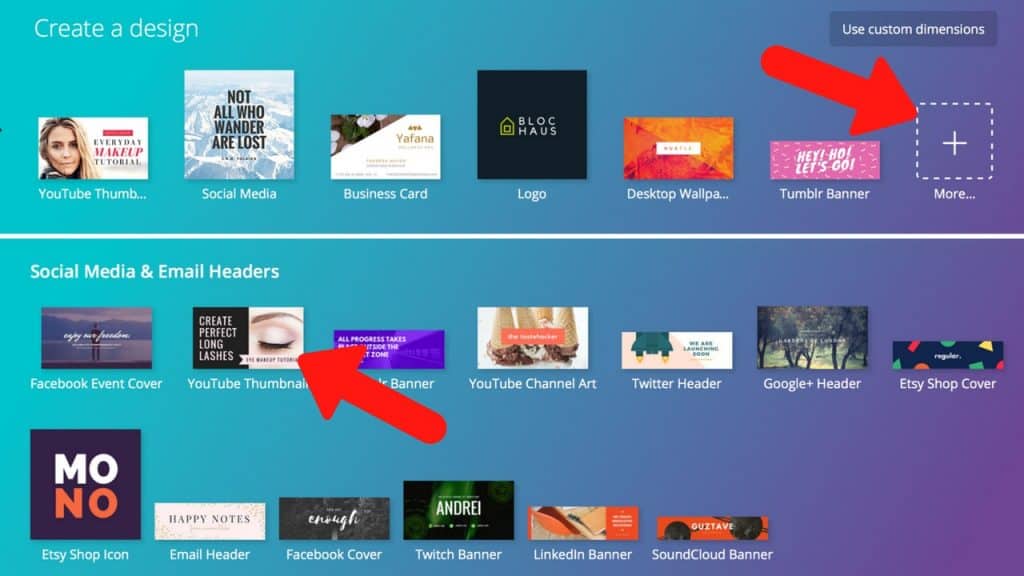
Once you have signed up to Canva, you can then navigate to YouTube thumbnail section which will be under More > Social Media & Email Headers > YouTube Thumbnails
Step 2: Pick Your Desired Template
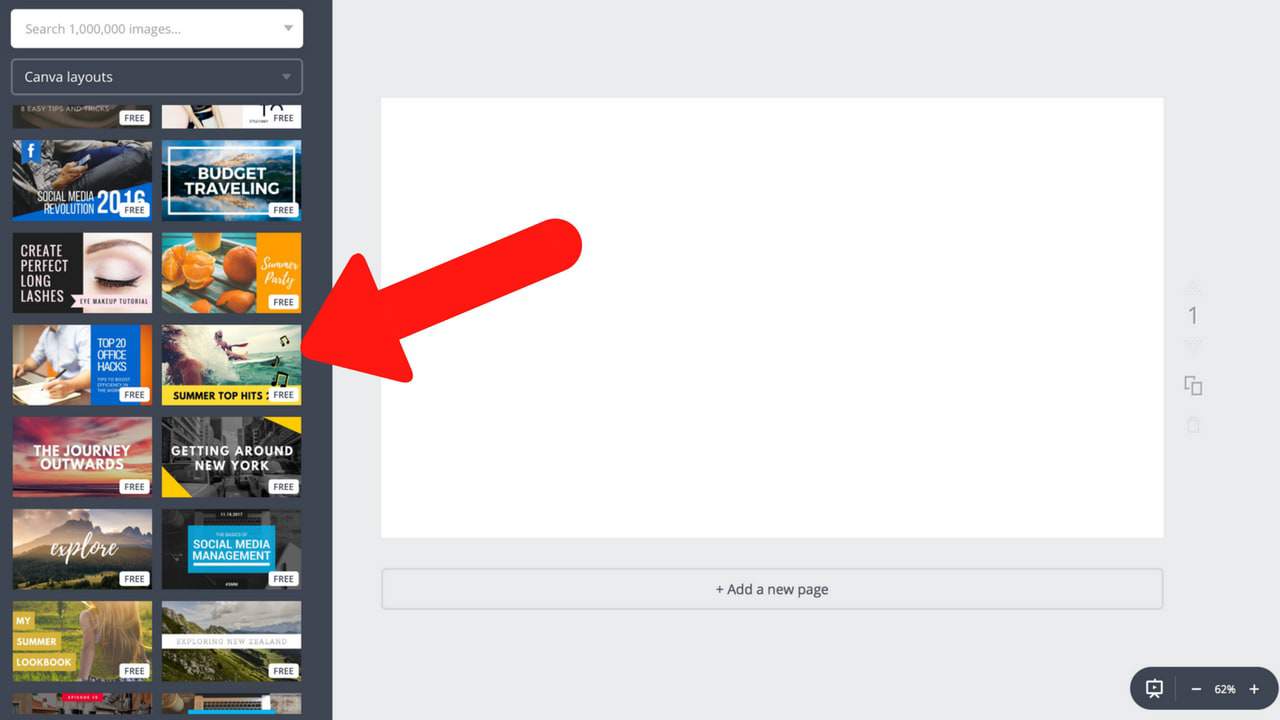
Once you have landed on the YouTube Thumbnail creation page, you will be greeted with hundreds of templates on the left hand side. Most of these are free, but there are some paid ones available that came at a price of $1. However in my experience, you can still make stunning YouTube thumbnails without paying.
There are literally hundreds of templates to choose from, so take your time and find one that you think will fit well with your YouTube channel. Also remember that it’s good practice to follow the same theme of thumbnails throughout all your videos as your viewers will be able to instantly recognise them.
Step 3: Add your own tweaks and creative flair
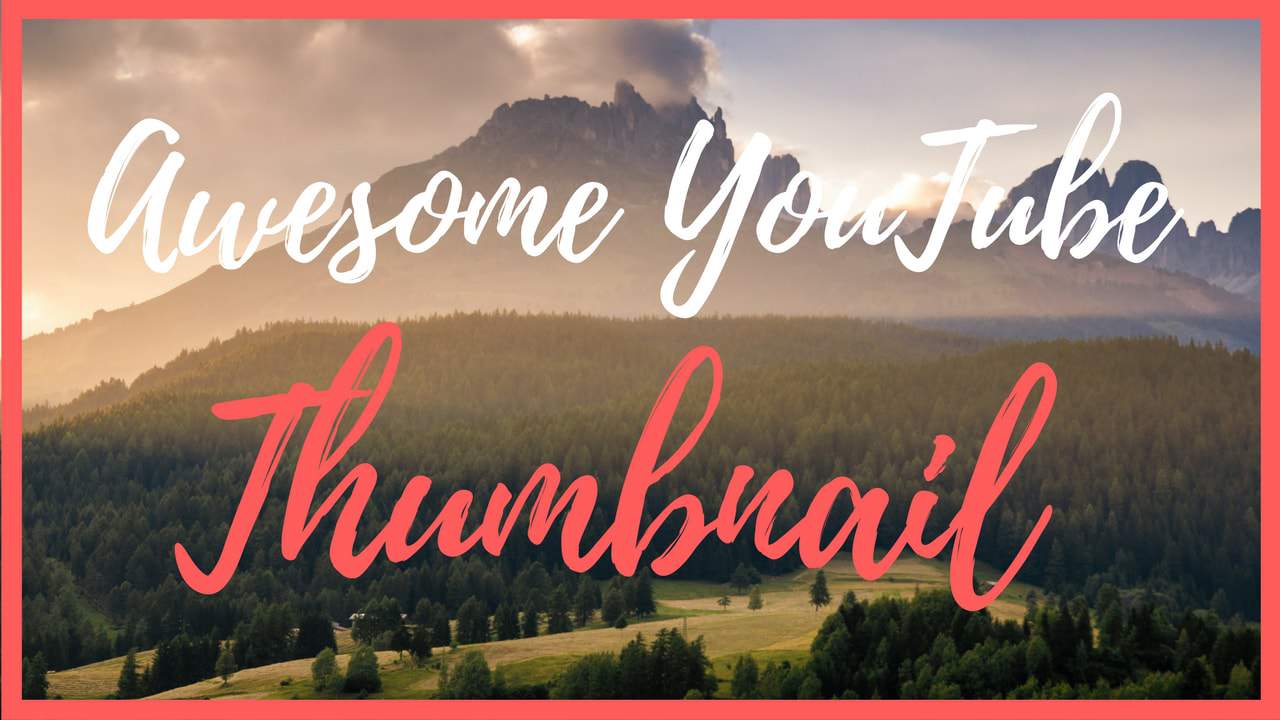
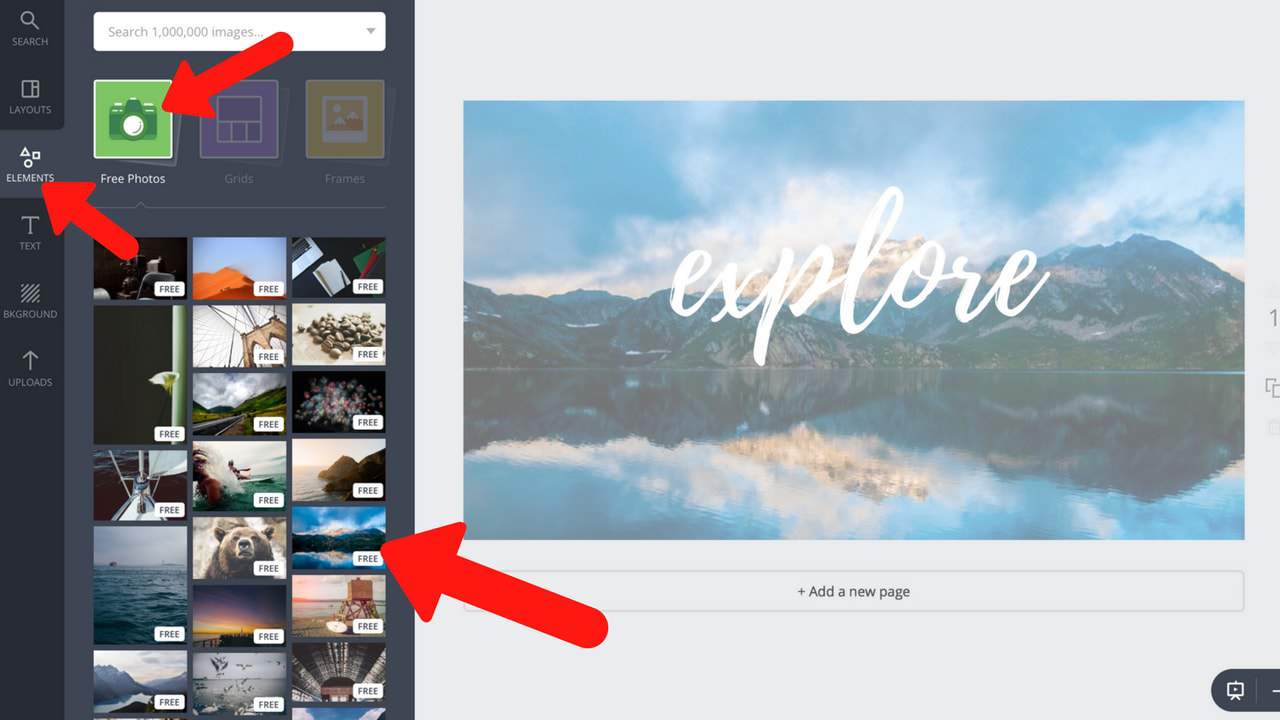
After you have decided on your desired template, you now have the ability to change the font, image, colors, graphics and pretty much anything else you want. Typically I try to keep mine as simple as possible and not stray to far away from the original design. You can easily change the background image by going to Elements > Free Photos.
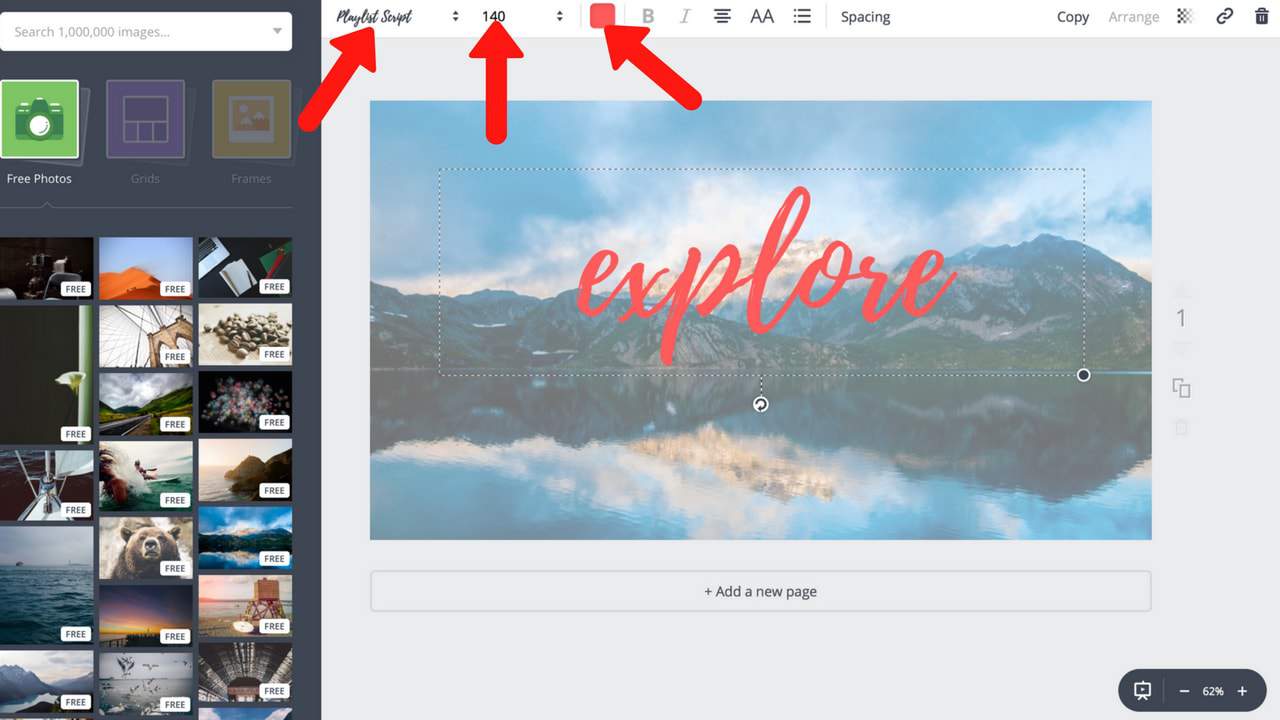
If you want to mix up the color of the text, size or change the font all together, simply click on the text in the middle. From there a settings box on top will come up, much like Microsoft Word or other editing softwares. You can now edit the text to your style.
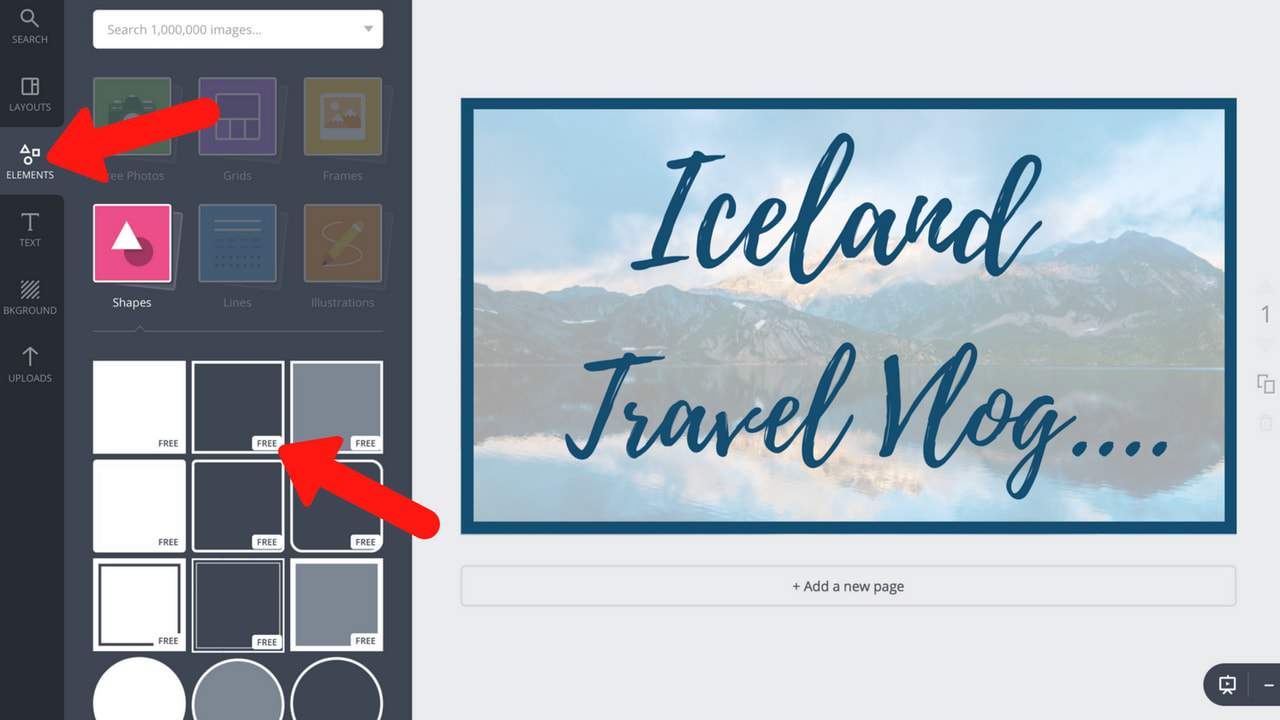
Last but not least I like to add a boarder to my thumbnail. I have noticed that when I use boarders, my thumbnails stick out a lot more on YouTube which in results gives me more views and subscribers. It’s only a little thing, but it makes a big difference. You can easily add a border by going to Elements > Shapes.
Step 4: Download your finished thumbnail
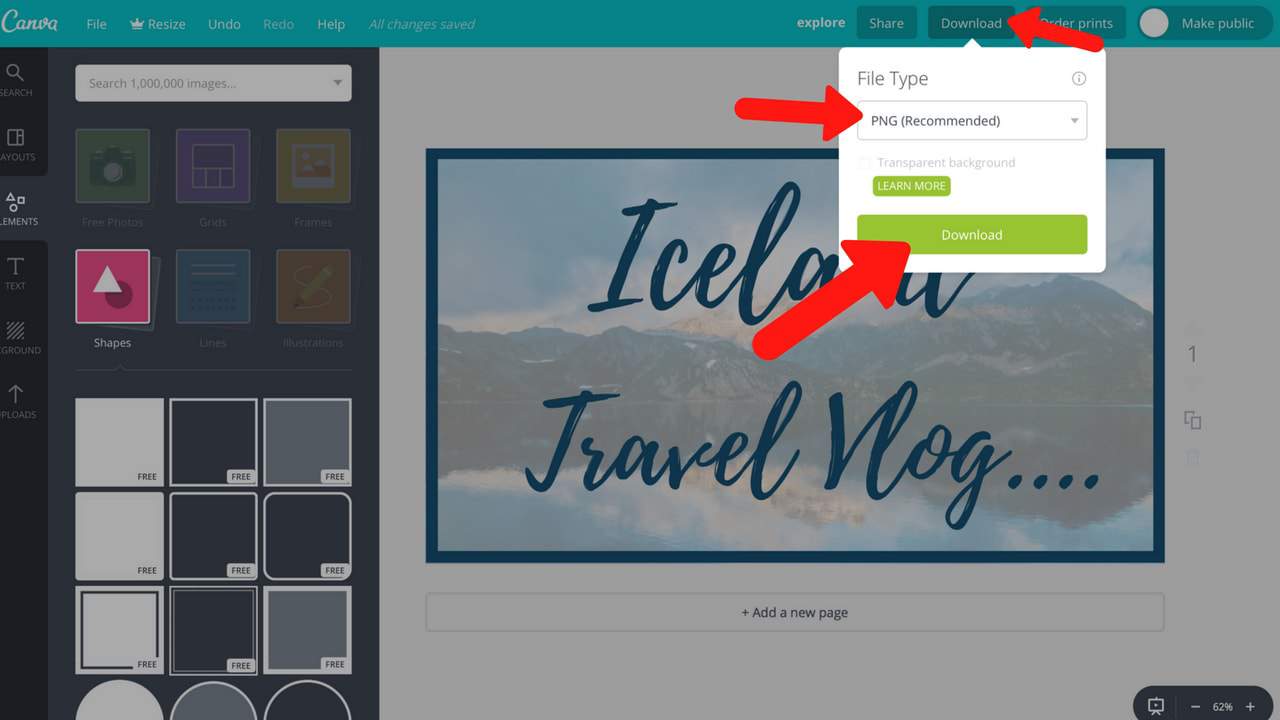
Once you are happy with the final result, you can now download your brand spanking new YouTube thumbnail! This is easily done by going to the top right hand corner under download. You then have the option to download in PNG or JPEG. Personally I use PNG format as the quality is much higher. Now you’re done!
Hopefully this guide on how to make a YouTube thumbnail has helped you in finding the right design for your channel. If you feel like I have missed any steps, please let me know as there are so many different methods out there. Happy YouTubing!
Learn more about Vlogging cameras and gear
- Guide To Picking The Best Vlogging Camera
- What Gear Does Casey Neistat Use?
- Best Vlogging Cameras with Flip Screens
- What Kind Of Cameras Do YouTubers Use?
- What Camera Does Zoella Use?


universal says
use this website http://getthumbnails.com/ it provides best quality thumbnails and also its free to use Hope u find it useful to use